
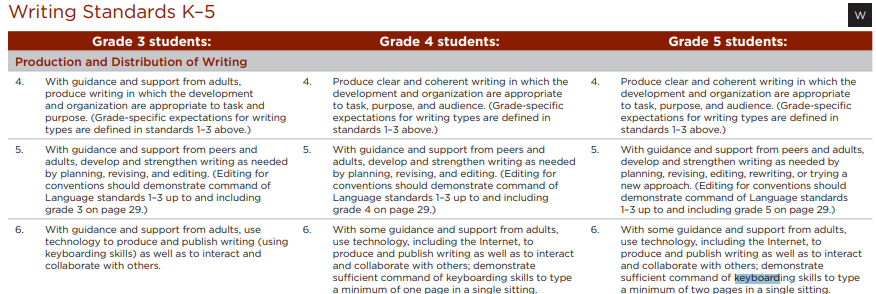
NOTE: Keyboarding shifted out of K-5 technology standards and into English Language Arts. See current standards below.

Click to Expand
This highly effective tool helps students of all skill levels improve their typing ability through guided lessons and engaging assessments.

5 Star Learning Rating connected to English Language Arts Common Core
|
|
Input / Output Devices
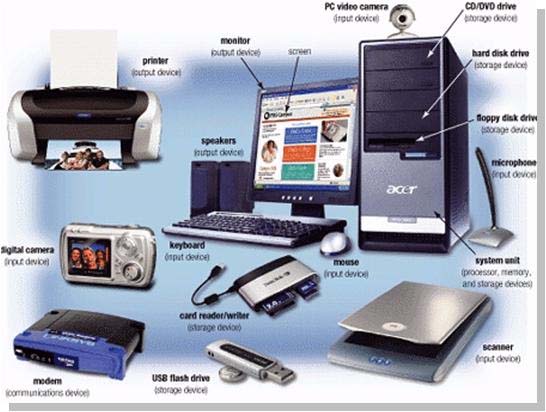
3-5.TC.1. use basic input and output devices (e.g., printers, scanners, digital cameras, video recorders, projectors)
I Can
I can sort computer parts into input and output devices.
I can use input devices like keyboards.
I can use output devices like printers.
I can use digital cameras as either an input or an output device.
I can touch type on a keyboard.
I can use all my fingers and thumbs to touch type.
I can type without looking at the keys on my keyboard.
I can use input devices like keyboards.
I can use output devices like printers.
I can use digital cameras as either an input or an output device.
I can touch type on a keyboard.
I can use all my fingers and thumbs to touch type.
I can type without looking at the keys on my keyboard.
Touch Typing Level 1

Why Learn to Touch Type? When you can do it well, touch typing is the fastest way to write. Many people can learn to touch type faster than they can write with a pen.
More school assignments will require typing. Learning to use 8 fingers and 2 thumbs will be much faster than "hunting and pecking" with just 2 index fingers. Even if you think you are currently faster with just your 2 fingers, resist the temptation to hunt and peck: you will be glad you learned to use all of your fingers and thumbs! Touch typing will also help you on the Michigan state tests later this spring.
The faster and more accurate you learn to type, the faster you can get your assignments done. Then you can get back to doing whatever you like to do best!
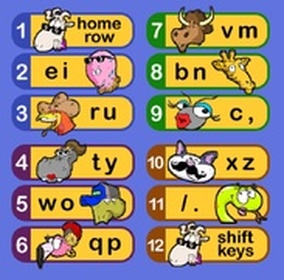
There are a total of 4 levels, with 3 stages inside each level. This is a total of 12 stages. Today we will focus on level 1, stages 1, 2 and 3.
If you finish all the stages in level 1 today, look for the chance to print your very own certificate! When you print, change the printer option to 114_CLR. If you show me your certificate in color, you can celebrate your success with Kid's Choice!
If your keyboard ever stops typing for some reason, and you know you are touching the correct key, just click anywhere inside the picture. The keyboard will now start working again. This problem happens every once in a while.
More school assignments will require typing. Learning to use 8 fingers and 2 thumbs will be much faster than "hunting and pecking" with just 2 index fingers. Even if you think you are currently faster with just your 2 fingers, resist the temptation to hunt and peck: you will be glad you learned to use all of your fingers and thumbs! Touch typing will also help you on the Michigan state tests later this spring.
The faster and more accurate you learn to type, the faster you can get your assignments done. Then you can get back to doing whatever you like to do best!
There are a total of 4 levels, with 3 stages inside each level. This is a total of 12 stages. Today we will focus on level 1, stages 1, 2 and 3.
If you finish all the stages in level 1 today, look for the chance to print your very own certificate! When you print, change the printer option to 114_CLR. If you show me your certificate in color, you can celebrate your success with Kid's Choice!
If your keyboard ever stops typing for some reason, and you know you are touching the correct key, just click anywhere inside the picture. The keyboard will now start working again. This problem happens every once in a while.
Finishing Outside of the Computer Lab
If you don't finish all the stages for today, feel free to finish what you did not get done at home, any library, at a computer in your classroom, or any computer that has internet access. All you need to remember is our website voycomp.com and type it into the address box for any web browser such as google chrome, firefox, internet explorer etc.
You do not have to start the whole level over again; just jump to the stage you left off with. Feel free to practice the higher levels before we do them for the official grade in class!
CAUTION: The website can tell if you jumped over a stage. If you want a certificate, you still need to do all 3 stages in a row.
It is OK to practice any level before we do it officially in the computer lab!
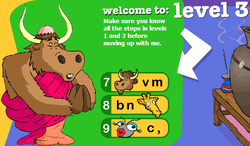
Touch Typing Level 2
The important things to remember are:
1. Use the correct fingers
2. Take your time
3. Rest your wrists on the keyboard tray
4. After each stage, take a rest.
Stand, stretch, shake your hands.
Roll your shoulders and neck. Relax your muscles.
5. It's important not to look at your hands when touch typing.
Keep your eyes on the screen. If your hands fit, slide your keyboard tray in.
6. If your keyboard ever stops typing for some reason, and you know you are touching the correct key, just click anywhere inside the picture.
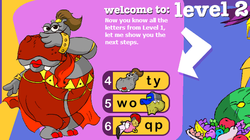
Touch Typing Level 3
Can you finish stages 7, 8 and 9 before class ends?
If you finish all the stages in level 3 today, look for the chance to print your very own certificate! When you print, change the printer option to 114_CLR. If you show me your certificate in color, you can celebrate your success with Kid's Choice!
If you finish all the stages in level 3 today, look for the chance to print your very own certificate! When you print, change the printer option to 114_CLR. If you show me your certificate in color, you can celebrate your success with Kid's Choice!
Touch Typing - Highest Level 4!
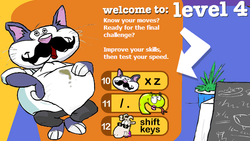
Are you ready for the FINAL challenge?
Can you finish stages 10, 11 and 12 before class ends?
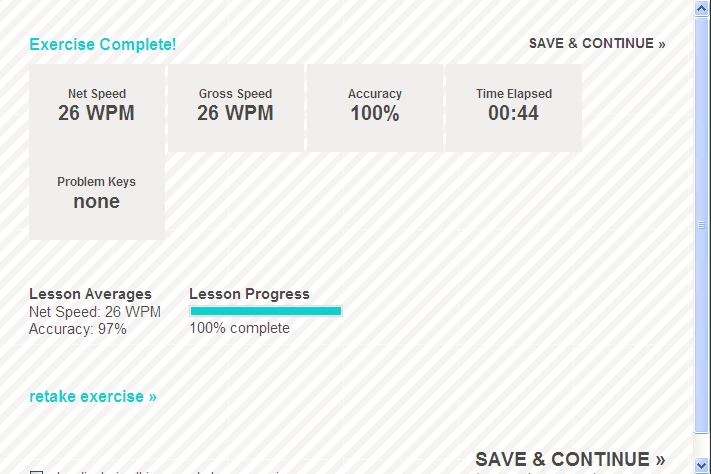
After the cartoon at the end of stage 12, you will be given an entire paragraph to type! This will test you for speed and accuracy. Your goals are 10 wpm for speed and 85% accuracy. You must type the paragraph before it will let you print a certificate. If you do not pass BOTH of your goals, you may retry the paragraph again. Make your best effort.
If you finish all the stages in level 4 today, look for the chance to print your very own certificate! When you print, change the printer option to 114_CLR. If you show me your certificate in color, you can celebrate your success with Kid's Choice!
Feel free to use Dance Mat Typing at home!
Can you finish stages 10, 11 and 12 before class ends?
After the cartoon at the end of stage 12, you will be given an entire paragraph to type! This will test you for speed and accuracy. Your goals are 10 wpm for speed and 85% accuracy. You must type the paragraph before it will let you print a certificate. If you do not pass BOTH of your goals, you may retry the paragraph again. Make your best effort.
If you finish all the stages in level 4 today, look for the chance to print your very own certificate! When you print, change the printer option to 114_CLR. If you show me your certificate in color, you can celebrate your success with Kid's Choice!
Feel free to use Dance Mat Typing at home!
Any stages you did not finish?
Some students only finish 2 of the 3 stages of a level the first try in Technology class. Below are the 4 stages that are sometimes only partially completed. Did you ever get to finish them? When you are finished with these, ask your self if there are any other stages you need to complete. If you have completed any of the stages at home, that counts for being done with that stage. Good job!


|


|
Intermediate Wrap Up
Why Learn to Touch Type? When you can do it well, touch typing is the fastest way to write. Many people can learn to touch type faster than they can write with a pen.
As you get older, more school assignments will require typing. Learning to use 8 fingers and 2 thumbs will be much faster than "hunting and pecking" with just 2 index fingers. Even if you think you are currently faster with just your 2 fingers, resist the temptation to hunt and peck: you will be glad you learned to use all of your fingers and thumbs when your classroom teacher gives you assignments that require typing. |

4 Star Learning Rating connected to English Language Arts Common Core
|
Goals for Speed and Accuracy
Let's set some Fall goals for lesson averages.
Net Speed = at least 10 to 15 WPM
Accuracy = at least 90%
Start on Intermediate Wrap Up. If Goals are achieved, move forward. Otherwise, choose something easier until you meet the goal, then work your way up!
If you complete the entire lesson and meet the both goals, you may play the games on the Typing Web site! Do your B.E.S.T!
Let me know if you beat the lesson averages for net speed and accuracy!
Those who reach both goals get more choices for touch typing, such as:
1. Dance Mat Typing
2. Power My Learning. Search for typing for your grade level plus or minus 1.
3. Typing Games Galore below.
Let's set some Spring goals for lesson averages.
Net Speed = at least 20 WPM
Accuracy = at least 95%
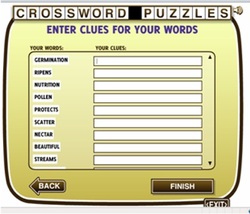
Crossword Puzzle Creator
Lesson 1
1. Find a partner and 2 computers next to each other.
2. Decide which K-2 puzzle you and your partner will do.
3. On separate computers, read the tips and hints.
4. Figure out the crossword puzzle. Help your partner if they need it.
Lesson 2
1. Find a partner and 2 computers next to each other.
2. Create separate puzzles with at least 3 words.
3. Switch seats and try to figure out your partners puzzle!
1. Find a partner and 2 computers next to each other.
2. Decide which K-2 puzzle you and your partner will do.
3. On separate computers, read the tips and hints.
4. Figure out the crossword puzzle. Help your partner if they need it.
Lesson 2
1. Find a partner and 2 computers next to each other.
2. Create separate puzzles with at least 3 words.
3. Switch seats and try to figure out your partners puzzle!
Digital Cameras - Taking Good Photos

Today we will get into teams of 4. Each student in the group will have a chance to direct their team to pose as they wish for 1 photo. Be creative, but stay within the rules of the school. Only the best photos will be posted on this website. Here are some tips to help.
1. Be aware of where the light and shadows are. Faces show up better in light, but direct light might make the eyes squint. Keep your shadow out of the picture too.
2. Photos turn out better when the camera is facing away from the sun and windows.
3. Hold the camera steady. Take your time.
4. Counting to 3 out loud before you take the picture helps people get ready for the picture.
5. Make sure the lighting on their faces is good before you take the picture and that everyone is looking at the camera and is looking good!
6. For today, try to take the pictures from knees to head of those in the picture. Not too much sky, ceiling, ground or floor. Move closer (or farther away) if you have to.
| fun_photos2.pps |
Race Typing

Let's try a race or 2 from this site. Can you reach both your goals?